Showing posts with label Projects. Show all posts

August 30, 2012

Sewing Spree!

     Whenever big events are coming up, or big changes are happening in our family life, I feel the need to Make Stuff. It's as if the primal survivalist nurturer in me is asking if I am prepared for whatever's coming and  when my modern Mamma answer is no, it screams, "Well, what are you waiting for? Get out the serger!" Or the cookbooks. Or the embroidery hoops. Or the knitting needles even though I can't knit. I feel like if I can make something then we will be ready. Even if it's just readiness in the sense that my family will know I care.

   Last weekend I went on a making spree, mostly sewing, which has carried over into this week and morphed in to baking and cooking and healthy lunch fixing. Be forewarned: expect a scrumptious waffle recipe and an onslaught of everything Bento in the days to come. Today though, sewing pics to share!


     Typically, I do not buy for my children shirts with a large expanse of stain-luring white covering the chest, but...these were $1 on the clearance rack, so I thought, why not? I'll make something cute to put on them. I asked Riles what he'd like and he requested one alien space ship, and one train with buttons. A little felt applique and an hour or so of sitting on Mamma's lap to 'help' later, and here we are. I love them!


      And for Laurelei...a new dress. Did she really need a new dress? Hmmm...not really. But Mamma really needed to do something with that yard-sale-score vintage apron.


      And doesn't every girl need a good twirling dress? I think so.


    And finally, custom Bento box covers for L's and R's school lunches. They picked the fabrics from my stash, I stitched.


    I love how they turned out!

    What about you, blogland beauties? Do you get the urge to Make Stuff when changes come your way? Share links- I want to see!
xo


April 3, 2012

Vintage Fabric Project #2

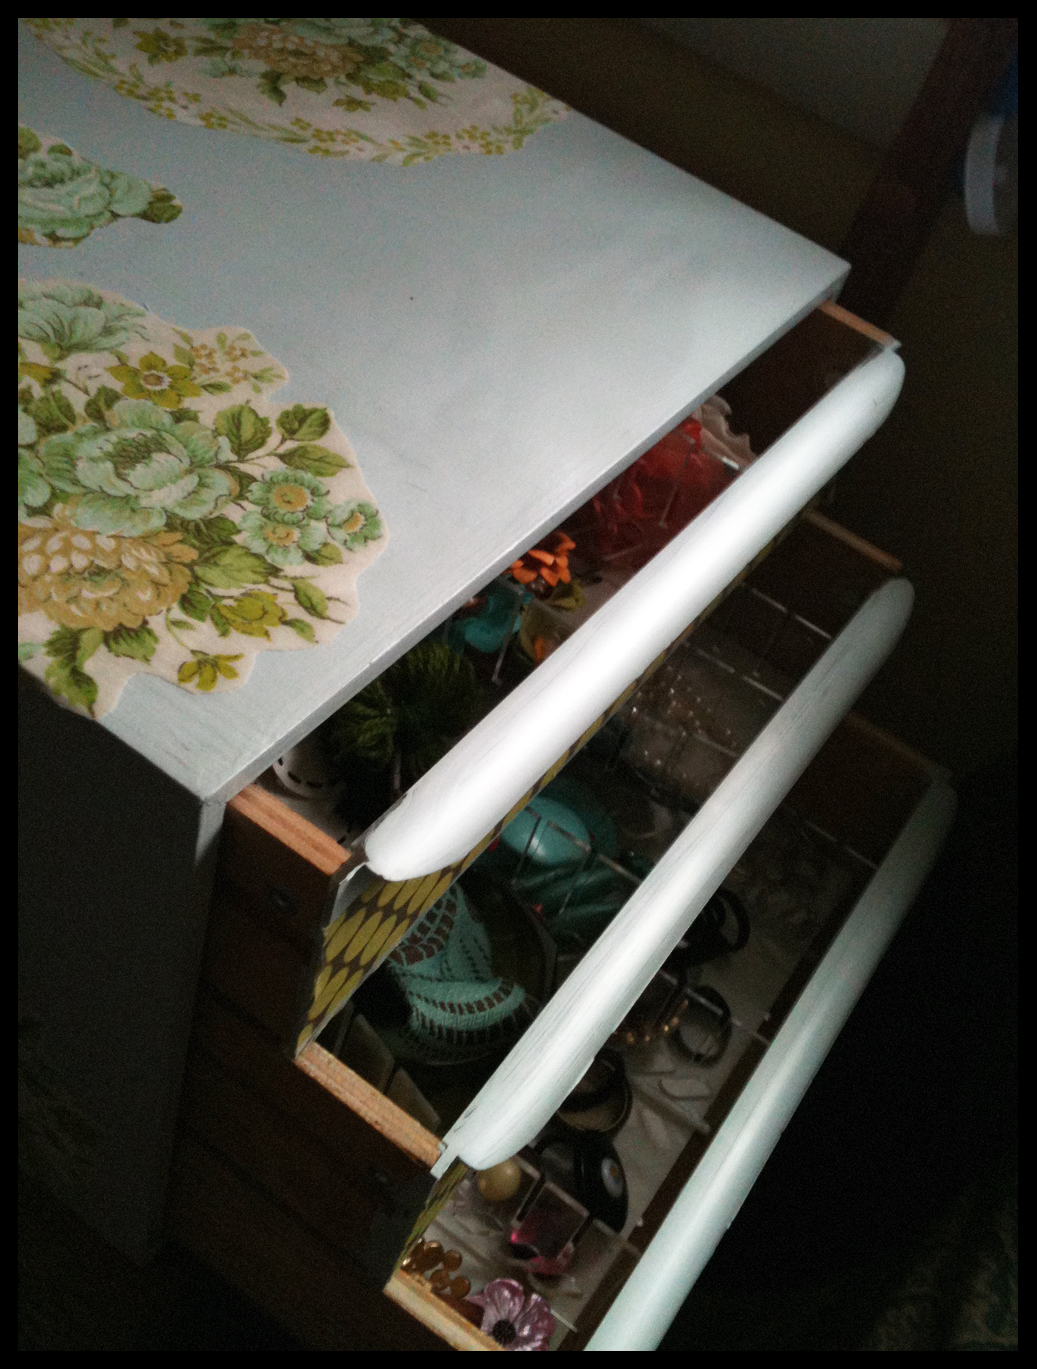
     I threw together this little project last week. Granted, it's not so much a 'fabric' project (although fabric is involved) as Vintage Fabric Project #1, but the box did come with my heap of vintage sewing goodies, so I officially declare, with auspicious, officious, and decorous decorum, this store-display-to-jewelry-chest upcycle to be Vintage Fabric Project #2.
Behold the before:


An embroidery floss/ crewel wool display case; nice honey-oak colored wood, three clear-fronted drawers, and a big DMC emblazoned on the top and sides. It was the adjustable dividers in the drawers, combined with the discombobulated, mish-mash state of my accessories, that got me thinking jewelry box.

And the after:


Isn't it pretty? May I just... express a little...um, if you'll excuse me for a mo'...
SQUEEEEEE!

I'm all better now.

Do you have projects have you finished lately that make you squee! for joy?
 Share the links, I wanna see!

xo


March 23, 2012

Hunger Games: Deep Thoughts and...Craft Time!

    I am conflicted, gentle readers.


See how conflicted I look?

    On the one hand, I consider myself to be an intelligent enough person and a serious enough reader to understand that the Hunger Games' post-modern dystopian world of Panem is, one might argue, a theoretical foreshadowing of the progress of America, with our obsessive, thoughtless consumption and our willingness to be entertained by  human failure and pain (hello, reality TV).  I fully realize that the surface story by which  we are all captivated--Katniss's story, and Peeta's and Haymitch's and Cinna's and Gale's--is a mere veil over an allegory of the soullessness of greed, ambition, and selfish, ignorant living. But on the other hand...I am SO GEEKING-OUT EXCITED about going to see the Hunger Games movie TONIGHT and showing you my craftalicious handmade Mockingjay T-shirt tutorial that I AM ABOUT TO PEE MY PANTS. (See actual emotion below.)


     (Q:How Capitol is that?)(A: Not as Capitol as the fact that I really want this nail polish.)
   
     I am officially letting myself off the guilt-hook for today. HUNGER GAMES DAY! It is, after all, just about a book series that is brilliantly written and addictive and thought-provoking, right? (Right? She repeats timidly.)
      Okay. Hunger Games T-shirts! I have seen many, many Hunger Games T-shirt tutorials online in the past few days (why do these books appeal so much to crafty types?) but I'm throwing in my own two cents anyhow. And I think my shirt turned out satisfactorily different than the rest. Once again, I am a little last minute on the event/holiday crafty bandwagon, but I have, finally jumped on board. My fellow last-minute crafters/ lit nerds with DIY skills: This one's for you.

You will need:
A plain black (or whatever color you want) T-shirt
A towel that can get paint on it
Straight pins
Scissors
Mod Podge (optional)
Waxed freezer paper (optional)
An exacto knife
Metallic spray paint in the shade of your choice
A print-out of this image:


And about an hour (with dry time)

We'll start with the optional part. I wanted my stencil to be a little more durable, usable more than once, so I mod-podged my print out of the Mockingjay image to a piece of waxed freezer paper, applying the mod podge over the top to seal it as well. This is totally not necessary, but I knew I would be doing multiple t-shirts and I thought this might help the stencil hold up longer (and, as is often the case, I was right). ;-)


Then I cut all the white away from my stencil print out, using scissors for the large areas and an exacto knife for the  finer details.
I bet you can see where the rest of this is going (you smart cookies, you) but I will lay it out anyway.
Lay out the shirt someplace where you can paint (well-ventilated, people) and use the towel, folded, to create a flat pad in between the layers of the shirt. This is not only to prevent any paint from bleeding through (not likely, but just in case), but also to provide a cushion to push your pins into.


Use your straight pins to secure the more delicate parts of the Mockingjay stencil.


Spray! Lightly and from at least 10 inches away.
Give your shirt 15-20 minutes to dry before you remove the stencil, and another 40-45 minutes before you wear it. If you have time to wash it before wearing, then you won't go to the movies smelling like spray paint. Which is always nice. And, yes! These are totally washable. Just use the delicate cycle and dry on low heat or air dry. And then look fabulous! (See actual fabulousness below.)


I made this one with the dolman sleeves for me...


...and this classic long-sleeve scoop neck for my bestie (who is almost as much of a last-minute crafter geek as I am).

Now go to it!
Happy Hunger Games Day!

xo  


p.s. Thanks to my awesome SiL, Heidi for being my green-sleeved spray paint model, and to my super-duper photographer daughter who took the pics of me in the shirts. Yup. Seriously. And she's 7.

March 19, 2012

Vintage Fabric Project #1

   This beautiful, foggy weekend...


in between celebrating my sweet hubby's birthday, getting out and
hiking as a family...

buying my tickets for Hunger Games (geek out *squeal*!)...


and squeezing in a little fiction writing time (that hasn't happened in a while),
I managed to whip out a little living-room perk-up with some of that new old vintage fabric I'm loving.


It all started with this sad piano bench I wanted to use for the kids to sit on at our dining table.


(See how sad?) 
But I had that gorgeous blue and green and gold tapestry-type fabric in my fabulous new old pile...and then going through my fabric stash and combining new with old, I found a quirky combination of prints and colors I love.


So I reupholstered the seat of the bench, and then threw together a few fun, simple pillows to pull the colors into our living room (which, in our little space, is the same room as the dining room) :-)


I love how everything turned out...patchwork and mismatched ruffles and unexpected color combinations..old fabrics mixed with new.


And a happy bench at our little table.

Hope your weekend was wonderful as well.

xo 


March 16, 2012

St. Patrick's Day Shabby Shamrock Tutorial

   
     I know, I know. I'm always a little late posting these things, but that's because I always plan and create my own minor holiday crafts last minute. By 'minor holiday' I mean any holiday other than Christmas and Easter. And maybe Thanksgiving and Halloween. St.Patrick's day? Definitely minor. We're neither Catholic nor Irish here, so there's really no 'getting into the spirit' of St. Patrick's Day around our house. It's a fun day to wear green and speak with a fake Irish accent, and it happens to be Brian's birthday, but that's pretty much it.
    Wow, I'm really building up the excitement for this tutorial, huh?
     Anyhow...in the interest of having something cute, understated, non-beer related, lacking glitter, and...oh, yes, green to wear on the day that has been set aside for the Wearing O' The Green, I hereby give you, my fellow last-minute crafters, the Amber June Studios

Requirements:
Fingers
Fine Yarn or Crewel Wool
Pin Back or Safety Pin
Hot Glue
A Little Twig


 Step One:
Without cutting your wool from the skein, begin wrapping a strand around the three middle fingers of your left hand (or your right hand, if you are a genius south-paw).
Wrap until you have a nice thick pillow of yarn looped around those fingers; at least 2 yards. More 
if you like.


Step Two:
When you are happy with the thickness of your loops, cut the yarn from its skein and tuck the loose end in among the loops.
Using a darker shade of green (did I mention the yarn should be green?), wrap and tie off the middle of your
yarn poof as you slip it from your fingers.

Step Three:

(This one was difficult to photograph one-handed, so I drew you a lil' picture.)


Step Four:
Continue wrapping the dark green yarn around the three sections of loops until you are happy with the 
shamrock-ness of your shamrock. Then, holding your little twig in place on the back of your 
shamrock, wrap the yarn around it as well, to secure it in place. Cut the wrap yarn from the skein.

Step Five:
Use a little daub (yes, I said daub) of hot glue to secure the end of the dark yarn and attach your 
pin back or safety pin at the same time  (I know, right?)


Voila! Shabby Shamrock.


Happy St. Patrick's Day. May all the...snakes stay out of Ireland...or something.
(No disrespect intended).

xo


January 23, 2012

Wedding Wreath

Just a quick share tonight...
This Paper Blossoms flower wreath/ crown was requested by a customer for a her daughter-- a soon-to-be bride-- to wear at her wedding tea. 


I'm just pretty dang happy with how it turned out.

If you're interested in a custom Paper Blossoms design, you can contact me through my shop:

xo